Aslında MacBook da olsa MacMini de olsa işletim sistemini baştan kurmak özel bir çaba ya da bilgi gerektirmiyor. Cihazınızı güç düğmesinden açarken klavyenizdeki belirli tuşlara basılı tutarsanız sizi bu işlemleri yapabileceğiniz bir ön yüz karşılayacaktır.
Sonra menüden seçimler ve bir kaç tıkla cihazınıza en uygun macOS sürümü indirilir ve kurulur. Ama normal şartlar altında.. Çünkü bazen de kurulmaz :)
Sizin bu yazıyı okuma sebebiniz bu ya da başka bir şey olabilir. Bir şekilde MacOS işletim sistemini indirmek, bu imajı USB stick’inize kopyalayıp MAC ‘inize kurmak istiyorsanız ve bu işlemleri Windows yüklü bir bilgisayar ile yapmak zorundaysanız doğru yerdesiniz.
Bunu yapmak için ihtiyacınız olanlar şunlar:
Yeterli hacimde bir USB Stick
Kurmak istediğiniz işletim sisteminin imajı (muhtemelen .dmg uzantılı bir dosya olacak)
Bu imajı USB stick’e yazmak için kullanacağımız bir yazılım. Ben TransMac isimli yazılımı kullandım. Ücretli bir uygulama fakat denemek için bir süre kullanmanıza müsade ediyor.
Bilgisayarınızda ADMIN yetkilerine sahipseniz uygulamayı indirin ve bilgisayarınıza kurun.
Kurulum tamamlandıktan sonra uygulamayı yine ADMIN haklarıyla açın.
USB Stick ‘inizi bilgisayarınıza takın
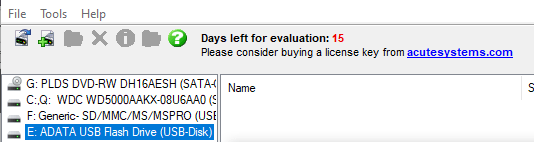
TansMac uygulamasında, aşağıdaki örnekten de görebileceğiniz gibi cihazınızdaki depolama üniteleri listeleniyor olacaktır.
Bu listeden USB Stick ‘inize sağ tıklayın ve Format Disk For Mac diyin. Sonra aynı USB Stick ‘e tekrar sağ tıklayarak bu kez Restore With Disk Image diyin.
Bu aşamada TransMac uygulaması size daha önce bilgisayarınıza indirdiğiniz MacOS imajının yerini soracaktır. DMG uzantılı dosyanızı gösterin.
Ve Bekleyin. Uzun süren bir işlem. Ama bittiğinde bir bootable MacOS kurulum USB Stick ‘iniz olacak:)
This area wasn’t clear for me during the time I was trying to access remotely to my work environment..
So I will try to share my experiences as simple as it can be.
I. Client Environment
MacBook Air
OS X (El Capitan, Mojave tested)
II. Necessary Applications
FortiClient for VPN
FortiToken (Available at apple store and google play for android devices) for 2FA (Two Factor Authentication)
Any Remote Connection utility (i.e. Microsoft Remote Desktop)
a. FortiClient Set-up
Once you’ve got FortiClientinstalled on your computer, it will locate its icon into your application folder; launch it.
Click the burger icon at the right side of VPN Name LoV. Select Add a new connection from the menu.
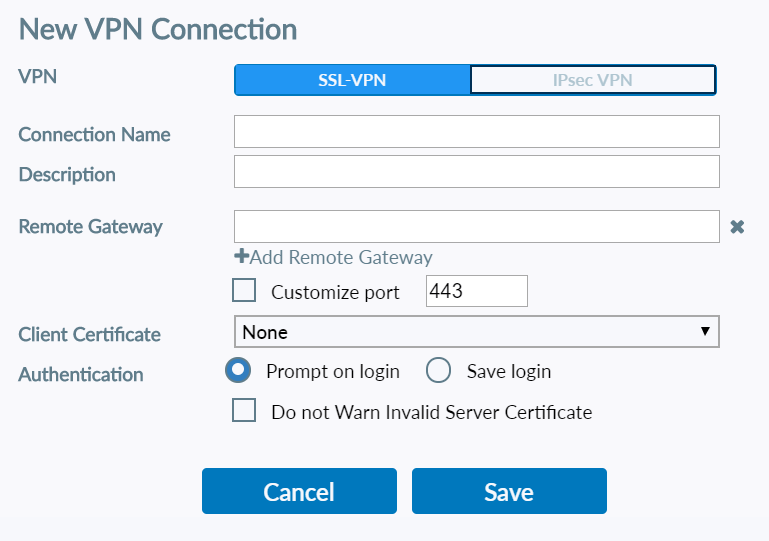
Then a new window will pop-up. Fill in the blanks by using following example.
VPN should be left as its default (SSLVPN)
You can give any name for the field ConnectionName
You can type any definition to the Description field
RemoteGateway is an IP address you should ask to your company ‘s IT department.
ClientCertificate left as it is.
Username provided by IT. It can be either a new user name of yours or same user name that you use to login your company computer, namely LDAP authentication. In that case, your password will be the same password you use to logon your office pc.
Apply it to keep this configuration. Afterwards you ‘ll be able to select the connection that you ‘ve created from the VPNName Menu. Select it, type your VPN password, then click Connect button.
Perhaps you’ll see some certificate warnings. Click Yes to proceed.
Caution:This password can be your Windows passwordbut not necessarily. It depends on your company’s policy/configration.
As you can see, I have 2fa in my example. Keep reading to find out why..
TOKEN generator
According to your VPN user’s security preferences, it may prompt you to enter authentication code. That you can populate from your FortiToken application on your phone. A paranthesis here, you’ll have to *activate* your FortiToken key generator first. If your VPN user has 2FA you must have received a key or QR code too. Use it to activate your fortitoken.
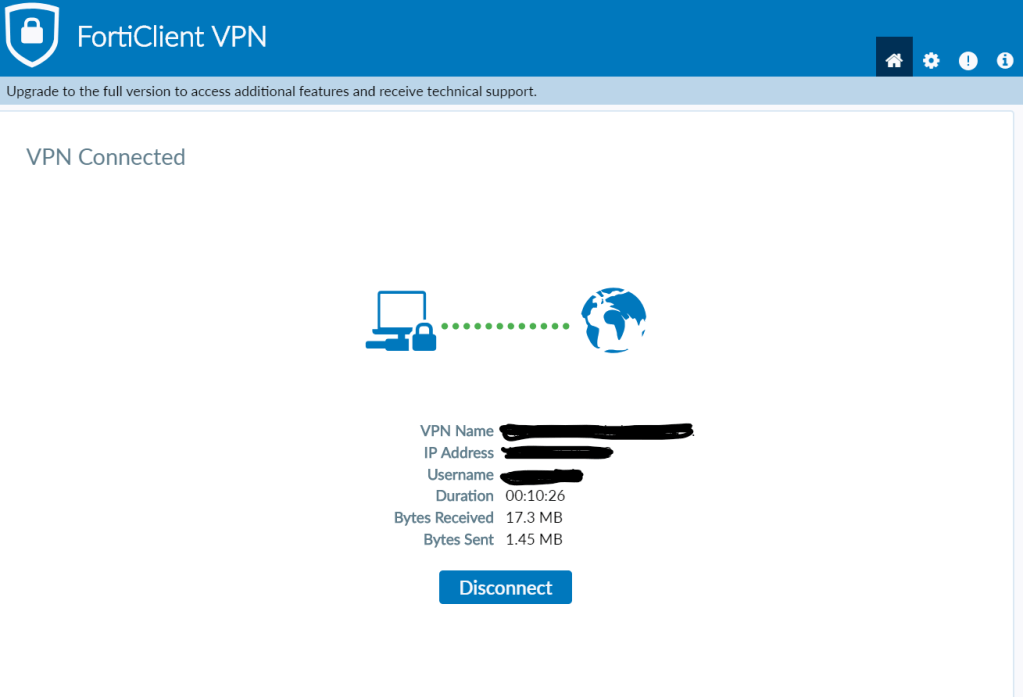
If a secure connection is established, you should be seeing a screen like this one:
This means that a secure Virtual Private Network connection is ready between your client and remote system. In short, you can access remotely to your office computer now.
b. Microsoft Remote Desktop Set-up
After VPN connection is established, open your remote desktop application. Give your company pc’s ip address and connect. It will ask you to enter your domain user name which will be something like MYCOMPANYDOMAIN\my.username
type it along with your password. This password is your office pc’s windows password. The one you use to unlock your computer.
If you have more than one screen you might need to take a look at DISPLAY tab and select use all of my screens.
That’s all.. well almost.
If you did all the things explained here and still failed to connect, take a look at your company computer’s remote access settings. See the image below;
Open a file explorer, right click THIS PC and select properties from the pop-up menu.
Now click to Remote Settings. If you don’t have necessary privileges, you ‘ll be prompted to enter user name and password who has the right access rights to this menu. So perhaps it’s best to ask IT help at this point.
Should you have the right, click Allow Remote Connections to this computer radio button. Then Click ADD, and add yourself.
IV. Exceptions and Notes:
You do need administrative rights on Clientcomputer in order to install these applications and configure them.
Perhaps you’ll need a key generator if some sort of 2FA is in place. If so, you may want to take a look at FortiToken. It’s available for download at apple store and google play.